
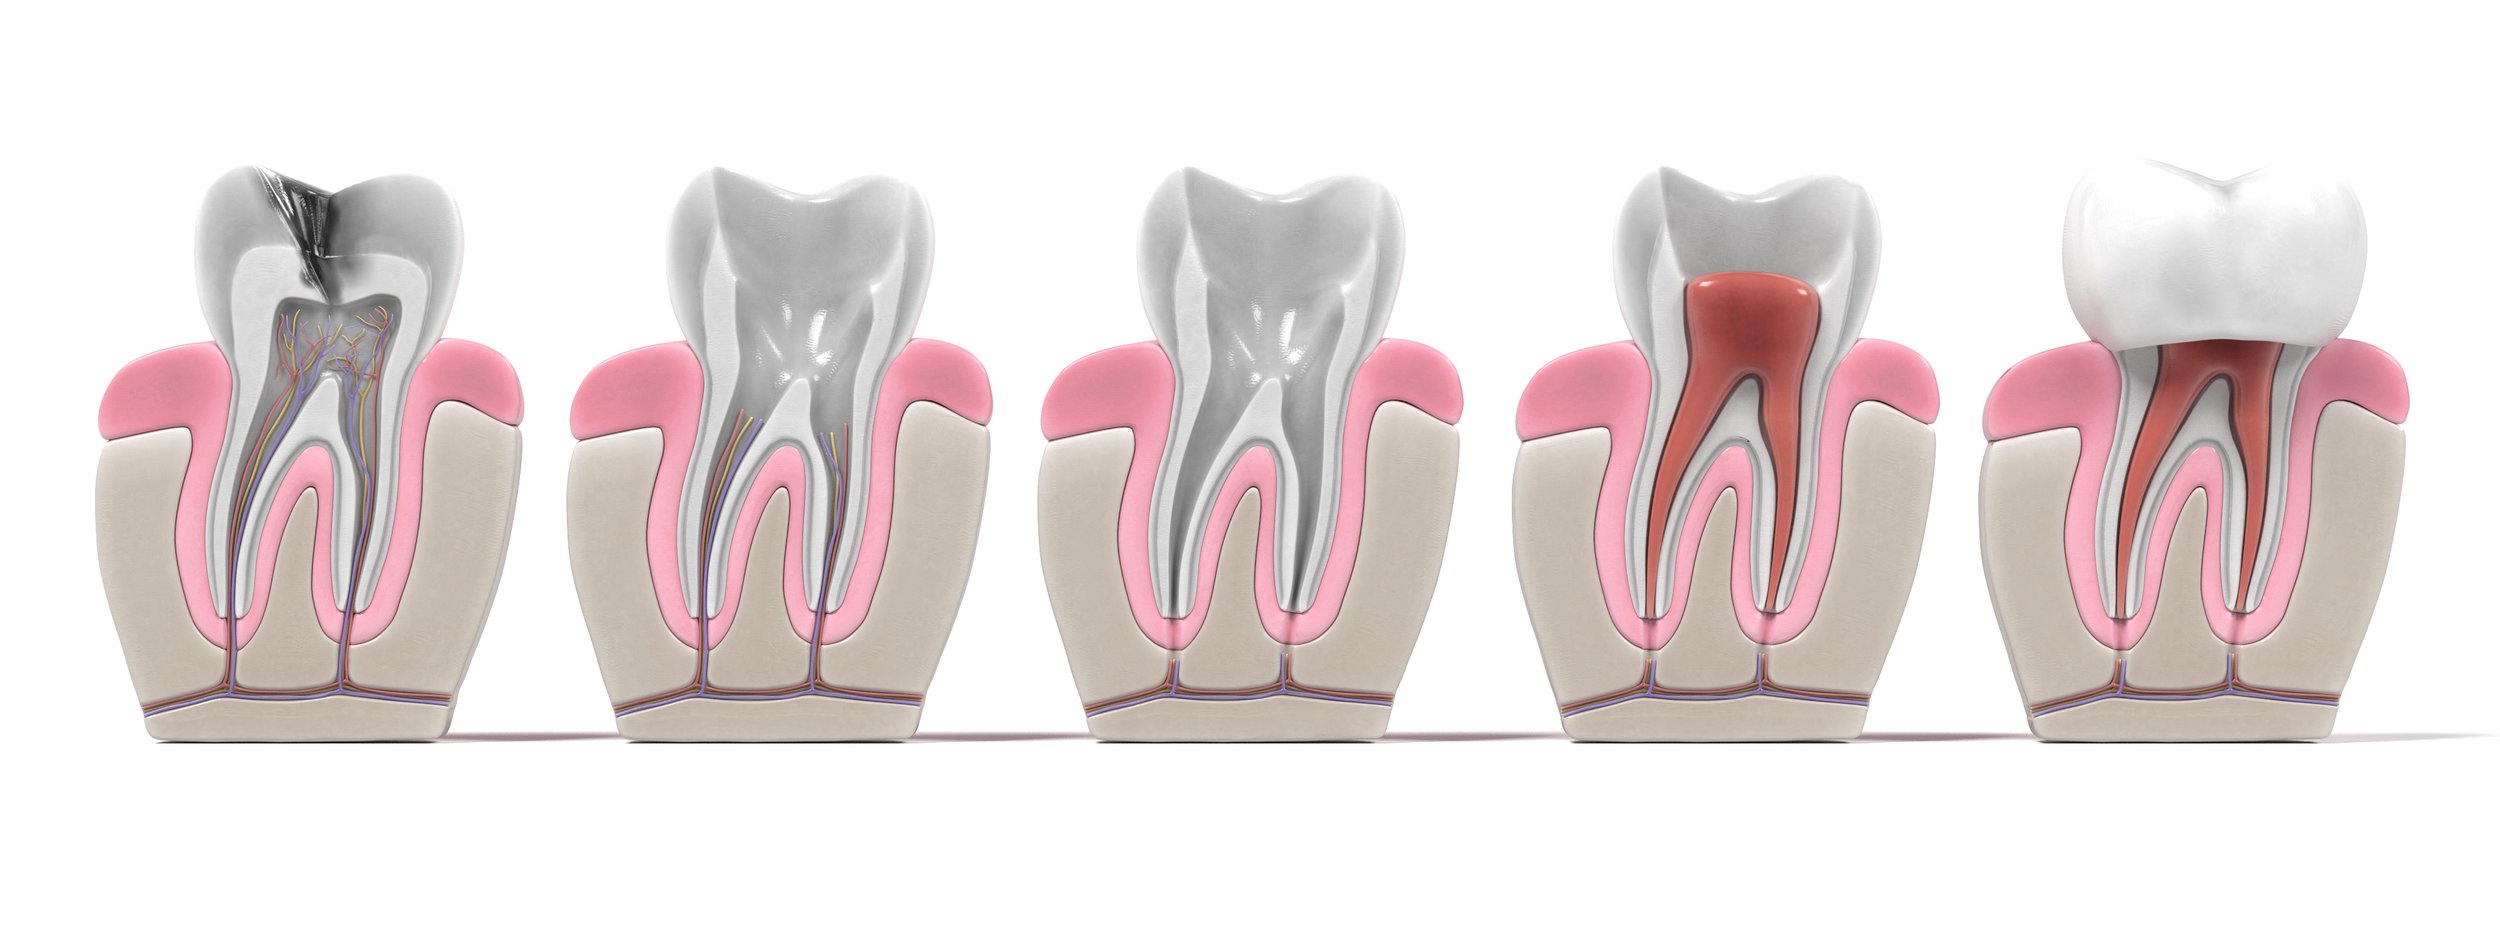
Root Canal Treatment
Root canal treatment, also known as endodontic therapy, is a dental procedure that addresses infections in the tooth pulp, the innermost part of the tooth. The process involves removing the infected pulp, thoroughly cleaning and disinfecting the root canal, and sealing it with a permanent filling. This treatment eliminates infection and helps you save the tooth, allowing it to remain functional for many years.
When is root canal treatment necessary?
This is a common question among patients. Here is the answer:
- Root canal treatment or endodontic treatment is most commonly required in cases of advanced tooth decay. At this stage, bacteria invade the pulp chamber, resulting in infected pulp that can become necrotic in time. These bacteria also breach the hard tissues of the tooth and cause irreversible damage.
- Another common reason for root canal treatment is an unexpected injury that causes a tooth to break (cracked tooth). Such damage exposes the pulp to bacterial infection, causing inflammation.
Traditional and microscope-assisted root canal treatments
The primary difference between the two methods lies in how the dentist identifies and cleans the root canals. In the case of traditional root canal treatment, the endodontist relies on their vision and manual skill. In contrast, microscopic root canal treatment uses a microscope to magnify the area, providing a much clearer view. This enhanced precision makes the latter a more reliable procedure with a higher likelihood of long-term success. For this reason, we exclusively recommend microscopic treatment for molars and premolars.
However, the steps involved in both methods remain the same. Let’s explore the key stages of the procedure!

What happens during a root canal?
Step 1: Establishing the diagnosis
The first step is the diagnosis which often requires an X-ray, even though the symptoms are typical in most cases. If the pain persists even after taking painkillers, root canal treatment is usually necessary.
Step 2: Anaesthesia
Complete anaesthesia is essential for a successful and pain-free root canal treatment. Although many people dislike injections or even fear them, there is no need to worry; the dentist or endodontist usually reassures patients that this is the most uncomfortable part of the treatment. Once the anaesthesia takes effect, the patient will not feel any pain during the procedure.
Step 3: Drilling through the crown
The purpose of this step is to access the pulp chamber, allowing the dentist to locate the root canals. This enables the cleaning, disinfection, and, ultimately, the filling of the canals.
Step 4: Locating the root canals
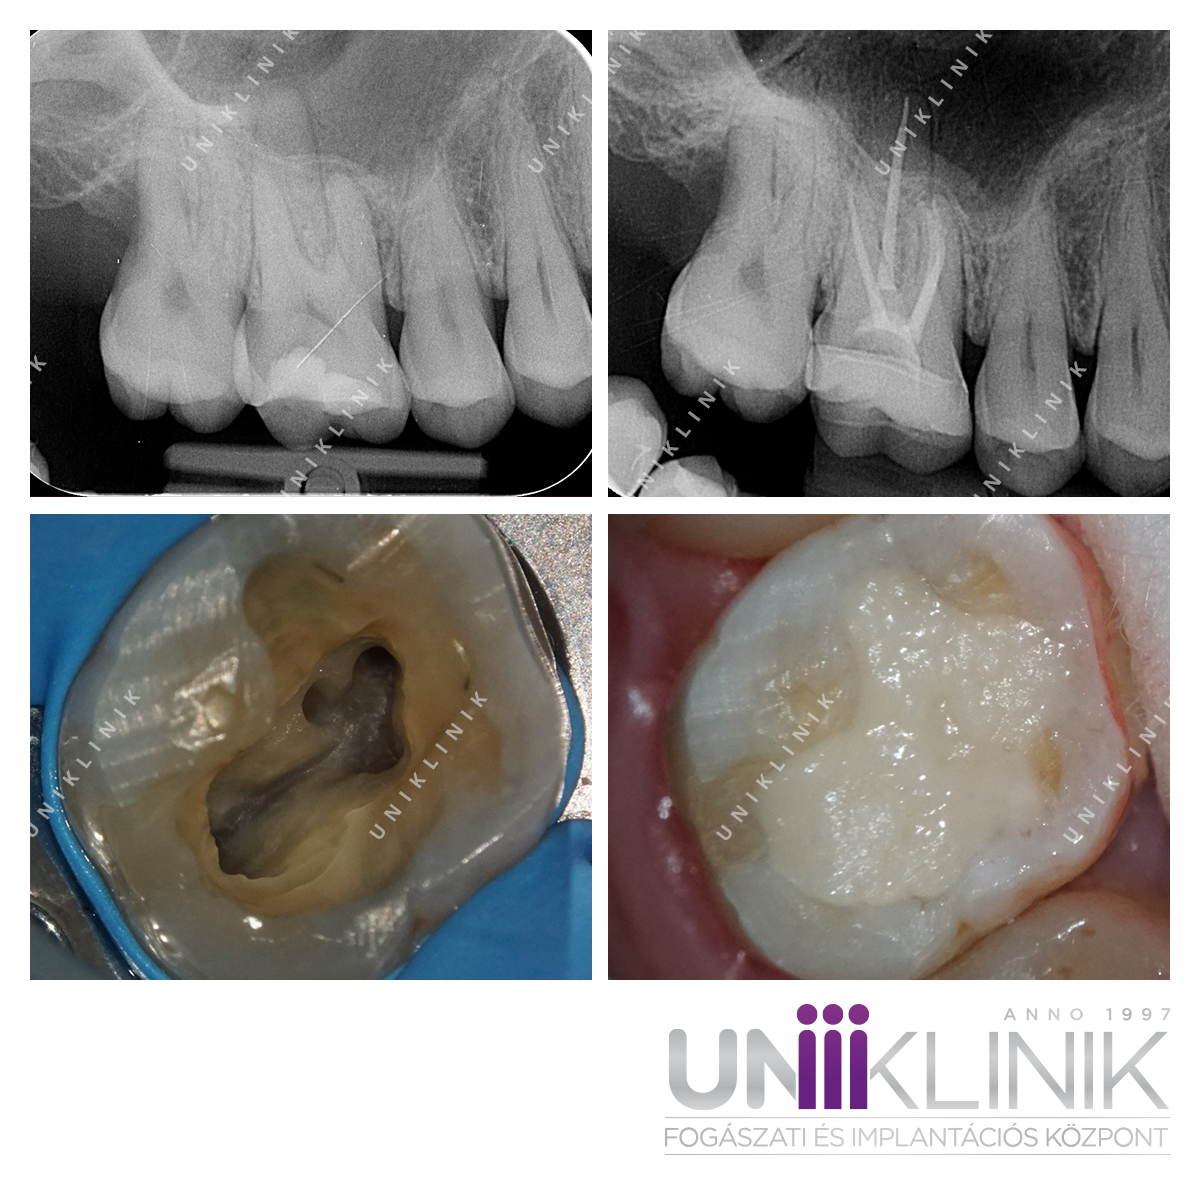
After accessing the pulp chamber, the endodontist carefully examines the tooth and identifies the locations of the root canals. This can be a challenging task, as the number and positioning of the root canals can be unexpected. As a result, measuring the length of the canals is often necessary.
In some cases, it’s the size that poses a problem. In the picture above, a small root canal is indicated which is not or just barely visible with the naked eye.
Step 5: Cleaning the canals
To clean the root canals in the infected tooth, the dentist uses various tools (such as root canal files) to remove the inflamed or necrotic pulp (blood vessels, nerves) from within the canals, as well as the outer layer of the root canal. This step aims to ensure that only healthy tissue remains inside the root canal.
Step 6: Injecting a disinfectant and anti-inflammatory substance into the canal
After the root canal has been exposed and cleaned, a disinfectant and anti-inflammatory substance is delivered into the canal with specially designed cannulas. This chemical cleaning process aims to make sure that the inflammation is completely eliminated.
Step 7: Inserting a temporary filling
This temporary filling serves to protect the treated area and allows the patient to eat more or less as usual. However, this temporary filling is not as durable as the permanent one, so it’s important to avoid putting excessive pressure on the treated tooth during meals.
Step 8: Inserting the permanent filling
The insertion of the temporary filling is typically followed by a one-week break. If no issues arise during this time, the dentist will insert the permanent root filling after one week, completing the procedure. If the patient experiences sensitivity or pain, the root canal needs to be flushed and disinfected with a different disinfectant. The cycle may repeat until the inflammation is completely resolved.
After the root canal treatment, it is extremely important to visit the dentist for a check-up every six months, during which an X-ray is taken each time.
Root canal treatments are generally performed following the eight main steps outlined earlier, but it is crucial to emphasize that individual treatments may differ significantly from this standard procedure.
Recovery from root canal treatment
You can help your tooth recover:
- Avoid chewing on the treated tooth until the treatment is complete.
- If you smoke, try to refrain from smoking after the root canal, as smoking can hinder the healing process.
- Brush your teeth after every meal and floss once a day.
- Use antibacterial mouthwash to keep bacteria at bay.
Recovery from root canal treatment usually takes a couple of days.
FAQ
How many times do I have to visit the dentist?
Root canal treatment can often be completed in one session, but multiple visits may be required depending on the complexity of the case.
Will a root canal hurt?
The good news is that only the numbing injection causes brief discomfort; afterward, most patients report little to no pain.
Does the root canal hurt after the treatments?
After the permanent filling, the tooth can be sensitive for a while. Some patient might experience significant pain for a couple of days; in some cases, it can take a few weeks for the pain to slowly subside.
How much does root canal treatment cost?
Prices depend on several factors, mainly the number of root canals. If you have more root canals, treating them will take more time and materials. If you are interested in our actual prices, read our article about restorative dentistry!
Microscope-Assisted Root Canal Treatment
This advanced procedure uses a special microscope to identify and treat even the smallest irregularities inside the tooth. It is especially effective when traditional root canal treatments fail.
Microscopic endodontic consultation (Panoramic X-ray not included)
Microscopic trepanation – single-canal tooth
Microscopic root canal filling – single-canal tooth
Microscopic trepanation – two-canal tooth
Microscopic root canal filling – two-canal tooth
Microscopic trepanation – three-canal tooth
Microscopic root canal filling – three-canal tooth
Microscopic trepanation – four or more canals
Microscopic root canal filling – four canals
Removal of old root canal filling
Microscopic trepanation for emergency patient
Root canal treatment Budapest
Do you need root canal treatment in Budapest? Call us or book a consultation via filling out a form! Our dental clinic is equipped with state-of-the-art technology, and our dedicated team will do everything possible to ensure you get the highest quality service. We offer both restorative and cosmetic dentistry treatments including smile design and tartar removal.
Additionally, our clinic has its own X-ray and CT laboratory, enabling us to perform all necessary imaging for an accurate diagnosis, ranging from simple periapical X-rays to panoramic radiographs and 3D CT scans.